
House Waterproofing: 5 Key Areas You Cannot Miss
How to Create a Waterproofed Home: 5 Key Areas to Focus On
Waterproofing your home is critical in protecting it from structural damage, mould, dampness, leakage and water seepage. This guide covers essential areas where waterproofing can prevent moisture issues and provide long-lasting protection.


Table of Contents
A home is a safe shelter and happy space for you. If your home is not waterproofed, it negates the very purpose of a haven you can return to each day. Let’s understand why it is so important to waterproof your home and how to do it right.
Why does your home NEED waterproofing?
Any building is exposed to constant water and heat both internally and externally. This exposure may lead to water-related damages that can easily escalate if left unattended. Dampness, seepage, and leakage are the kinds of damages that can cause a host of issues like mould, peeling paint, health hazards due to fungus, stains, breaking of tiles, etc.
Effective waterproofing solutions are essential for protecting your property from these issues. Whether it’s roof waterproofing, foundation waterproofing, bathroom waterproofing, or more, taking preventative measures is necessary.

Key areas that you should focus on
These areas are constantly exposed to weather and water elements. Waterproofing these areas ensures the best condition for your house -
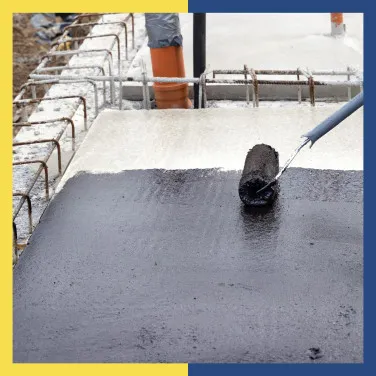
Roof waterproofing
The terrace or roof of a home is constantly exposed to the elements. Without roof waterproofing, the chances of leakage are high, as rainwater can seep into the rest of your home. Conventional methods of terrace waterproofing include brickbat coba or mud phuska. They are rigid and do not move with temperature variations, resulting in cracks and can cause seepage, which is why modern terrace waterproofing solutions and professional guidance are vital.
In a nutshell
-
Common issues -
Roofs are constantly exposed to rain, sunlight, and temperature fluctuations, leading to cracks, leaks, and water infiltration. Left unchecked, or without terrace waterproofing, water penetration can damage ceilings and interior walls and even lead to mould growth.
-
Maintenance -
Regularly inspect for cracks or pooling water on the roof and ceiling surfaces. Cleaning gutters and downspouts helps prevent water accumulation.
-
Waterproofing solutions -
High-quality roof or terrace waterproofing products create a protective barrier to prevent water infiltration. range is a great solution for waterproofing the roof and open terrace areas.

Water tank waterproofing
Both overhead and underground water tanks have to be completely waterproofed. Water tank waterproofing solutions are specially designed to prevent water from escaping and damaging surrounding areas. It also stops rainwater or any other elements from penetrating inside the tank. This protects the tank, water quality, and adjacent walls, preserving the tank’s integrity.
In a nutshell
-
Common issues -
Water tanks can develop leaks that compromise surrounding walls or flooring, leading to moisture problems. Leaks in water tanks without waterproofing may go unnoticed until they cause visible damage.
-
Maintenance -
Regularly check for cracks or dampness around the tank, especially if it’s located on a terrace or within walls. Ensure that the tank is cleaned periodically to prevent bacterial growth and odour. Terrace waterproofing adds an extra safety barrier from water tank leakage.
-
Waterproofing solutions -
Waterproofing coatings specifically designed for water tank waterproofing are essential to prevent leaks and preserve the tank’s structural integrity. For waterproofing the inside of a tank, you may consider an acrylic cementitious waterproof coating or a 2-component epoxy waterproof coating. Dr. Fixit Pidifin 2k is a thorough, 2-component coating perfect for waterproofing overhead water tanks. It is also safe for potable water.

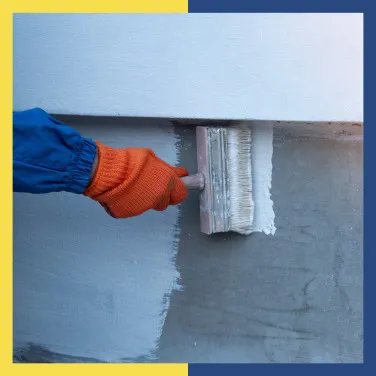
Interior and exterior wall waterproofing
Like the terrace, external walls are exposed to the elements, especially harsh sunlight and rain. Water can slowly seep in and damage the internal walls without waterproofing the exterior wall. Instead of a fresh coat of paint to beautify your external walls, try an all-in-one solution such as Dr. FixIt Raincoat, which waterproofs completely and also comes in different colours so that you don’t need an additional coat of paint after waterproofing.
Similarly, tell-tale signs first appear on the internal walls when water seeps in. The most common sign of water ingress is damp patches on the internal walls, which cause concern. If left untreated, they can cause harm and damage to the walls of your home with stains, peeling paint, mould, and more. This makes interior wall waterproofing a must-have.
In a nutshell
-
Common issues -
Walls are prone to water seepage, leading to damp patches, peeling paint, and even structural degradation. Interior wall waterproofing addresses issues like condensation and high humidity, while exterior wall waterproofing protects against rain and moisture.
-
Maintenance -
Watch for any signs of dampness, peeling, or efflorescence (white salt deposits) on walls. Seal any visible cracks promptly and address drainage issues.
-
Waterproofing solutions -
Applying a high-quality water-resistant coating is crucial. Exterior wall waterproofing treatments like breathable, weather-resistant coatings prevent moisture infiltration, while interior wall waterproofing products can help maintain a safe and aesthetic indoor environment.
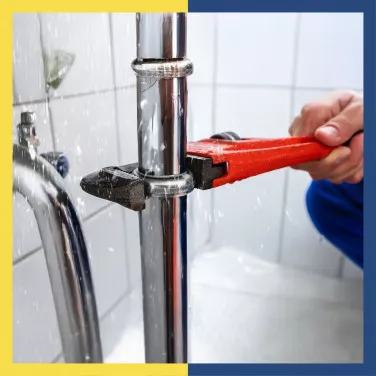
Bathroom waterproofing
Bathrooms are wet areas, and if the tiling has not been done carefully, the dampness and moisture in the bathroom can slowly damage your walls. Aesthetically, damp patches can lead to flaking paint – definitely not a pretty sight. However, even from a safety point of view, dampness should never be allowed as it can cause slipping accidents and unhealthy mould-related hazards.
In a nutshell
-
Common issues -
Bathrooms face constant exposure to water, making them highly susceptible to leaks, mould growth, and structural damage. Without bathroom waterproofing, moisture can seep into floors and walls, weakening the structure and leading to unpleasant odours.
-
Maintenance -
Regularly clean grout and inspect for any cracks around tiles, floors, or walls. Ensure good ventilation to minimise moisture build-up.
-
Waterproofing solutions -
Quality bathroom waterproofing solutions like Dr. Fixit protect surfaces from water damage. The Dr. Fixit Bathseal products guarantee leak-free bathroom waterproofing.

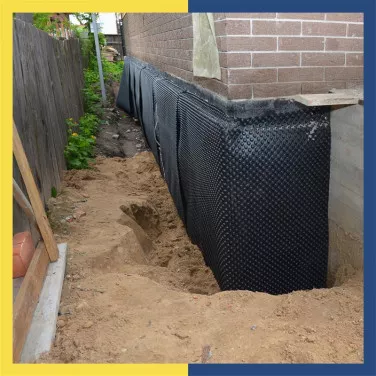
Foundation waterproofing
The foundation is the most critical part of any home’s structure. Foundation waterproofing safeguards against groundwater seepage, which can weaken the foundation over time and damage the walls inside with efflorescence. This has to be done during the construction of your home. By using effective house waterproofing solutions, you secure your home’s base, safeguarding it for the long term.
In a nutshell
-
Common issues -
The foundation is vulnerable to groundwater seepage. Without foundation waterproofing, issues like basement flooding or damp flooring can impact the home’s stability.
-
Maintenance -.
Address any drainage issues around the foundation to reduce water accumulation near the base.
-
Waterproofing solutions -
Foundation waterproofing solutions during construction are the only way to waterproof your foundation and ensure the base of your home remains strong and stable.
Long-term benefits of proper waterproofing with guidance
Investing in professional waterproofing solutions for your home brings significant long-term benefits. Quality waterproofing not only protects the structure and prevents dampness but also enhances air quality, reduces maintenance costs, and extends the lifespan of your property. With home waterproofing in place, you can rest assured that your home remains a safe, dry, and healthy space for years to come.
And with a professional like D. Fixit, you can ensure quality service and efficient waterproofing. For more details, fill out the form given below to reach out to us.
Get Professional Waterproofing Solutions Today
Fill The Form below to took free site evaluation by Dr. fixit point safe painting service expert


New Home
Importance of getting waterproofing before designing your house | Drfixit Waterproofing Solutions

New Home
Playing with Colour - The rang barse wall protection from Dr. Fixit Raincoat - The Happy Homes

New Home
The difference between waterproofing and damp proofing | Drfixit Waterproofing Solutions


New Home
Is your contractor doing a hasty job? Here's how to ensure quality waterproofing solutions


New Home
Waterproof coating for walls: Selecting the long-lasting solution for your walls


Get Professional Waterproofing Solutions Today
Fill The Form below to took free site evaluation by Dr. fixit point safe painting service expert