
The Complete Home Waterproofing Guide (India)
The Complete Home Waterproofing Guide for Indian Homeowners
Start with the source of moisture. Home waterproofing starts with identifying where water enters, not just treating visible damp patches. Different areas need different waterproofing solutions. Roofs, walls, bathrooms, tanks and basements face different moisture conditions. Waterproofing is a preventive investment. Timely treatment can help reduce recurring leakage and protect plaster and finishes. Professional assessment improves results. Correct surface preparation, product selection, application and curing are essential.



Table of Contents
Your home faces moisture and heavy monsoons every year. Proper home waterproofing helps you manage these risks and safeguard your home against serious leaks. It also helps prevent recurring dampness and wall seepage.
The right approach starts with diagnosis. First, identify where moisture enters. Then, choose suitable waterproofing solutions for that area. Dr. Fixit can help you understand the problem and select the right system for your home.
Why Every Indian Home Needs Waterproofing
Indian homes face different moisture challenges year-round. Monsoons can expose your roofs and external walls to water. Bathrooms and tanks face moisture exposure every single day. Good waterproofing protects more than the visible surface. It helps reduce the risk of recurring leaks, which in turn prevents more serious damage from constant water exposure.
The cost of skipping it
- Ignoring early seepage can increase later repair costs.
- Moisture can damage plaster and finishes and can even cause structural damage over time.
- Persistent dampness can also affect indoor air quality and your health.
Waterproofing is therefore a preventive investment. As a planning benchmark, its cost can be viewed as a fraction of construction costs, sometimes around 1/4X depending on the scope. The actual requirement varies by area, site conditions, and the treatment required.
A Room-by-Room Waterproofing Plan
A quick look at common waterproofing concerns
| Home area | Common concern | Suitable Dr. Fixit solution |
| Roof and terrace | Rainwater, cracks and seepage | Dr. Fixit Roofseal Select / Newcoat Cool |
| Interior and exterior walls | Dampness and moisture ingress | Dr. Fixit Raincoat / Dampguard |
| Bathrooms and wet areas | Water seepage through wet zones | Dr. Fixit Bathseal |
| Tanks and basements | Water penetration and dampness | Dr. Fixit Krystalline / LW+ |
Start home waterproofing with the most exposed areas. A professional can assess the surface before recommending a treatment.
Roof & terrace
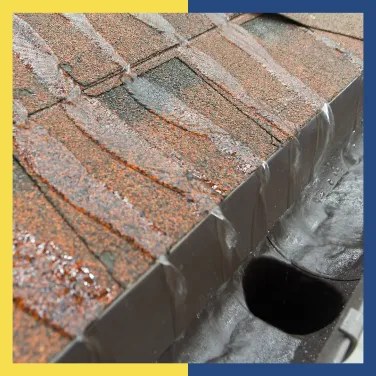
Your roof is directly exposed to rain and sunlight 24/7. Cracks, joints, and surface deterioration can let moisture in. Roof waterproofing should address the surface condition and likely entry points. Dr. Fixit Roofseal Select is designed for roof applications.
It is also important to waterproof your roof before monsoons, as unprotected exposure to rain can lead to serious leakage issues throughout the season.
Walls (interior & exterior)
Damp walls can have several causes. Rainwater ingress, cracks, and moisture movement are common possibilities. Plumbing issues can also create similar symptoms. Wall waterproofing starts with identifying the actual source. Dr. Fixit Raincoat and Dr. Fixit Dampguard can provide suitable long-term protection to your walls.
Bathrooms & wet areas
Bathrooms experience frequent, prolonged water exposure. Moisture can travel through joints, corners, cracks, and concealed areas. Plan bathroom waterproofing before installing surface finishes. Bathroom waterproofing products, like Dr. Fixit Bathseal, are designed to protect the vulnerable surfaces in wet areas.
Tanks & basements
Water tanks and basements require specialised treatment. Their waterproofing needs depend on the level of water exposure and the construction site conditions. Only do tank waterproofing after a professional assessment. Dr. Fixit Krystalline is often recommended for basement and tank waterproofing, as it forms a durable and long-lasting protective layer.
How to Get Waterproofing Right (The Process)
The process
- A reliable process starts with inspection. First, identify the source of moisture. Then, assess the surface condition and repair defects.
- Next, select the appropriate waterproofing system. Follow the recommended application method carefully. Allow the system to cure for the required period.
- Avoid treating only visible symptoms. A damp patch may indicate a deeper moisture problem.
- Expert assessment helps ensure the solution addresses the actual cause.
- Dr. Fixit waterproofing products are designed for a wide range of waterproofing applications. Review the available products to find one suitable for your home’s vulnerable areas.
Budgeting & When to Call a Professional
Waterproofing costs depend on several factors. These include the area, surface condition, and treatment required. Plan the budget around the complete system, not just the product. Surface preparation, repairs and application can affect the overall cost.
A professional assessment is especially important for widespread dampness. It is also recommended for structural cracks and recurring leakage.
DIY vs professional
Waterproofing is not simply about applying a coating. Incorrect diagnosis or preparation can leave the underlying issue unresolved. For this reason, homeowners should seek expert help. A professional can assess the source, recommend suitable waterproofing solutions and guide the application process.
A well-planned home waterproofing system can help protect your home from recurring moisture problems. Start by identifying the affected area and addressing the cause. If you need any help with waterproofing your home, consider filling out the form below to connect with Dr. Fixit’s expert consultants.
Frequently Asked Questions (FAQs)
How do I waterproof my whole house?
Start with a professional inspection of exposed and wet areas. Assess the roof, walls, bathrooms, tanks and other moisture-prone zones. Then select systems based on each area's requirements.
Which areas of a home need waterproofing first?
Prioritise areas with active leakage, recurring dampness or high water exposure. Roofs, terraces, bathrooms, tanks and vulnerable walls commonly need attention.
Which Dr. Fixit product should I use for each area?
The right product depends on the application and surface condition. Roofs may require Dr. Fixit Roofseal Select, walls may require Dr. Fixit Dampguard, while Dr. Fixit Bathseal can be used for bathrooms.
Can I waterproof my home myself?
Waterproofing requires correct diagnosis, preparation, application and curing. It is best to seek professional help, especially for recurring leaks or complex areas.
When is the best time to waterproof a home?
Ideally, assess and complete waterproofing before heavy monsoon exposure. However, the right timing depends on the area's condition and the treatment required.
Can waterproofing prevent dampness permanently?
A suitable system can help reduce recurring moisture problems when correctly diagnosed and applied. Results depend on the moisture source, surface condition, application and maintenance.
Get Professional Waterproofing Solutions Today
Fill The Form below to took free site evaluation by Dr. fixit point safe painting service expert


Get Professional Waterproofing Solutions Today
Fill The Form below to took free site evaluation by Dr. fixit point safe painting service expert
