
Waterproofing Walls: Step-by-Step Guide to Protect Your Walls
Wall waterproofing and repairing: 6 tips for resilient walls
Waterproofing a wall properly starts well before you pick up a brush, with wall repairs coming first. Mould, efflorescence, damp patches, and peeling paint are all signs your wall needs attention before any waterproofing solutions for walls are applied. Maintenance is what keeps your waterproof wall working long-term, as a one-time fix isn't enough. Dr. Fixit offers targeted products to support every stage of your wall renovation, from repair to protection.


Table of Contents
Before starting wall waterproofing, it is necessary to understand how to repair your walls correctly. Proper repairs prevent future damage to your walls while enhancing the durability and longevity of their waterproofing materials.
This article delves into the importance of repairs before wall waterproofing and provides practical guidance on how to make your walls waterproof. Follow these tips for a lasting solution to common moisture-related issues.
6 Best tips for a long-lasting and durable waterproof wall

- Assess your walls before anything else
Before any repair or wall renovation begins, take stock of what you're working with. Walk the perimeter of the room and look for visible cracks, staining, bubbling paint, or a white powdery residue on the surface. A contractor can help you with this identification. Catching these signs early tells you how extensive the repair work needs to be and which waterproofing solutions for walls will be the right fit.
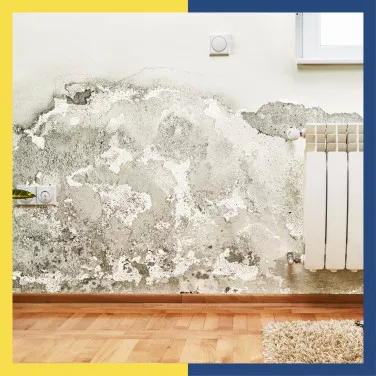
- Remove mold, mildew, and efflorescence

Walls affected by moisture often develop mold, mildew, and efflorescence. These not only pose health risks but also weaken the building material of your walls. It is crucial to address these issues before proceeding with waterproofing a wall.
To handle mold and mildew, use a mold remover or a mixture of water and bleach. Clean the areas thoroughly while wearing the necessary protective gear. Ensure proper ventilation during and after cleaning.
Scrub the area with a stiff brush and a mild detergent to remove efflorescence. Rinse the walls with clean water and allow them to dry completely. To prevent efflorescence in the future, apply Dr. Fixit’s efflorescence treatment.
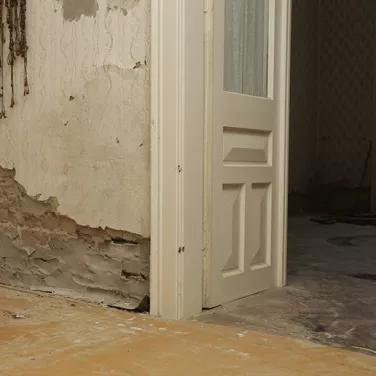
- Fix damp patches, peeling paint, and blistering
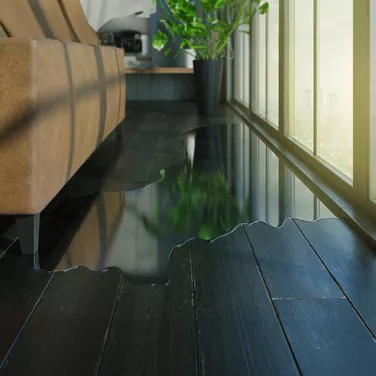
Damp patches on walls signal water infiltration from external sources. First, you have to remove or repair the underlying external cause. Then, treat the damp patches with a waterproofing solution to prevent future issues.
Moisture-related damage on walls also manifests through their paint peeling or blistering. Remove the loose or damaged paint using a scraper and clean the surface. Before repainting with a moisture-resistant paint, apply a good-quality primer.
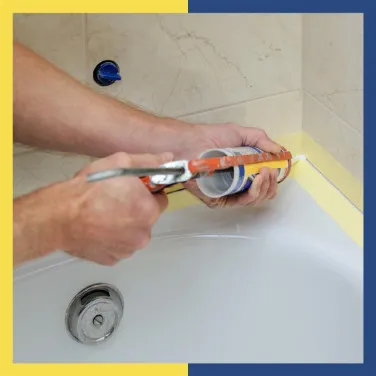
- Seal around windows and doors
Gaps and cracks around poorly sealed windows and doors allow moisture into the walls. Use weather-strip tape or adhesive caulk to seal them properly. This helps prevent water intrusion and improves your wall's resilience against moisture.
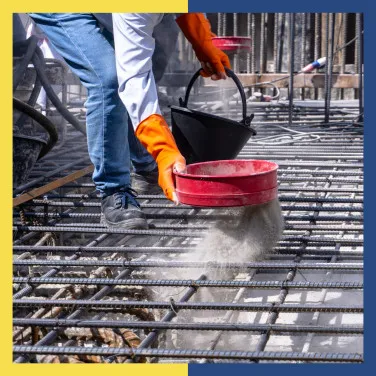
- Fill cracks and repair structural damage
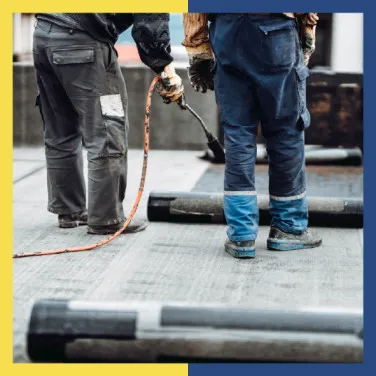
Hairline cracks may look minor, but they are common entry points for water. As part of any thorough wall renovation, ensure your contractor fills cracks with a cement-based or polymer-modified filler before waterproofing a wall. For wider or structural cracks, you need a professional who can implement the right repairs and waterproofing solutions for walls, since unrepaired and untreated structural damage will not hold for long.
- Learn how to maintain a waterproof wall
For thorough wall waterproofing, correct maintenance is the key. Taking these few measures ensures the longevity of your walls:
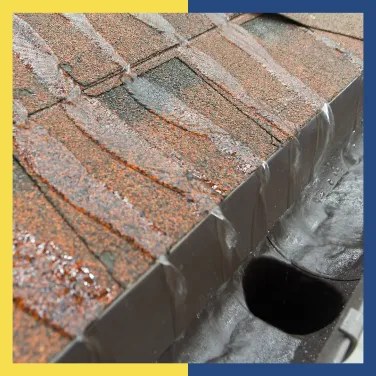
a. Keep gutters and downpipes clean to prevent water accumulation around the foundation
b. Monitor indoor humidity levels and, if necessary, use a dehumidifier
c. Inspect the walls regularly for any signs of moisture-related damage


Repair to prepare your walls with Dr. Fixit
Before waterproofing a wall, effective repair of moisture-related damage is essential. Dr. Fixit provides a range of high-quality products and services that can help. Reach out to experts at Dr. Fixit for advice and information by filling out the form below.
Frequently asked questions (FAQs)
What are the common causes of wall damage and moisture intrusion?
The most frequent culprits behind wall damage and moisture intrusion are poor drainage, cracks in the wall surface, gaps around windows and doors, leaking pipes, and rising damp from the foundation. Condensation from temperature differences between indoor and outdoor air is also a significant factor, particularly in poorly ventilated spaces.
What are the key features of your waterproofing solutions?
Dr. Fixit's waterproofing solutions for walls are designed to be durable, flexible, and compatible with a range of surfaces. With each product formulated for different areas of the house and stages of construction and renovation, they offer breathability, so trapped moisture can escape without compromising the protective barrier.
Will waterproofing my walls improve my home's energy efficiency?
Yes. Damp walls conduct heat more readily than dry ones, which means your home loses warmth faster in winter and gains heat faster in summer. By waterproofing a wall and keeping moisture out, you improve thermal insulation, which can reduce heating and cooling costs over time.
Are there any additional benefits to waterproofing beyond preventing water damage?
Yes. Waterproofing inhibits mould and mildew growth, which directly improves indoor air quality. It also protects the structural integrity of your walls over time and reduces the frequency of cosmetic repairs like repainting. As part of a full wall renovation, waterproofing adds measurable long-term value to the property.
How long does the waterproofing process take?
It depends on the scale of repair and the products used. Surface treatments on a single wall can be completed in a day, with curing times of 24-48 hours. Larger projects involving crack filling, wall renovation, and multi-coat waterproofing solutions for walls may take 3-5 days from prep to final application. Always factor in drying time between coats.
Get Professional Waterproofing Solutions Today
Fill The Form below to took free site evaluation by Dr. fixit point safe painting service expert


Renovation
Questions you should ask a society manager about building repairs before buying an apartment


Renovation
Protect your living space: Difference between a weatherproof and waterproof house


Renovation
How to safeguard your home with waterproofing during the rainy season in India


Get Professional Waterproofing Solutions Today
Fill The Form below to took free site evaluation by Dr. fixit point safe painting service expert